How to create a starburst in your photos
Zach Rohe Photography
Wedding, Portrait, & Landscape Photography in Sedona & Beyond
How to create a starburst in your photos
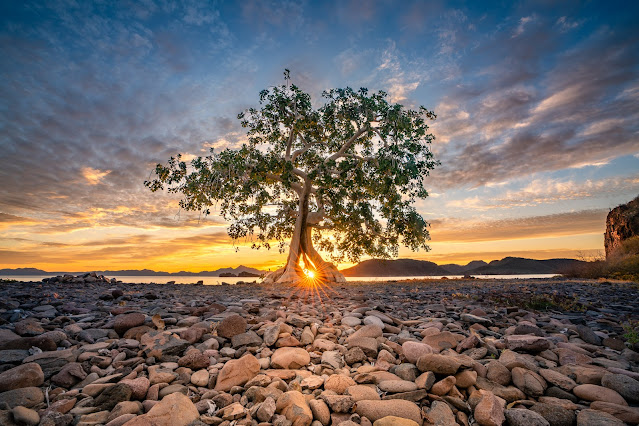
Loreto, MX – Sony 16-35 GM @16mm f/16
Written by
Comments
What is a starburst?
Basically a refraction of light through the aperture of your lens. Sound too scientific? Basically it’s an effect professional photographers use to create a star from a bright light like the sun. Some of my most popular photos feature starbursts, sunstars, or whatever you want to call them! I like using them as a way to make a simple photo look unique and a great photo to be a wall worthy print, like the photo above!


Why would I want to create a starburst?
To show off your skills and make a boring photo look amazing. In the photos below, the subject matter isn’t very interesting. But just by adding that little sunstar, the photos take on a whole new life. Add on to the fact that it’s super easy and gives your photos a professional look, the question is why wouldn’t you want to try to recreate this effect!
How do I create one?
It’s actually very simple, you start with a bright light piercing it’s way through something… in the above examples it’s part of a tree. But it can also be through clouds or through rock. By partially obstructing the light, you are increasing refraction and contrast which are essential for these shots. If you don’t have something to block part of the light, your photos will often turn out like the one below…

San Felipe, MX – Sony 16-35 GM @ 24mm f/18
The aperture or f/stop of your camera’s settings often dictates how the starburst looks as well. I can often get starbursts with an aperture of f/9 or above but f/16 seems to be the sweet spot. Shutter speed and ISO are irrelevant, but the camera needs to stay still so I use a tripod with shutter speeds below 1/10 of a second. Here are some other tips:
- It helps if the sun is lower in the sky or along the horizon for maximum effect.
- Different lenses capture starbursts more easily and differently. Using UV or other filters may diminish your starbursts.
- It is difficult to create this effect in video without a lot of light due to the high shutter speeds needed for non blurry video.
- Be patient and get a few shots, see which one you like the best.

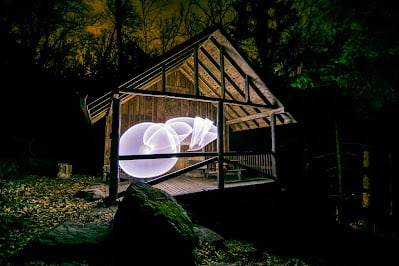
LaPaz, MX – Sony 70-200 GM2 @122mm f/16

LaPaz, MX – Sony 70-200 GM2 @122mm f/16
The above examples were taken at night by a different lens and from a distance. While the shape and size of the starburst is different, the concepts of capturing this effect are all the same: small aperature in camera and high contrast or blocking of the light source.
Visit my galleries for prints and wall art with starbursts

Sedona, AZ – Sony 16-35 GM @16mm f/11
What is the science behind this visual phenomena?
You made it this far and you want to learn more? Here are the basics. Light is refracted creating points of light inside the lens which is then transmitted to your sensor in these lines of light. If you have a circular aperture, there are no lines created and thus no starburst. Also, if you have a lens with an even number of aperture blades you get half the lines in your starburst than a lens with odd numbered blades. Personally, I like lenses with both but most of my lenses feature an odd number of blades as you can see above. You can often find reviews on different lenses that will discuss their starburst quality. I used to have the Zeiss Sony 16-35mm lens and it had a very distinct starburst as you can see below.

Yosemite, CA – Sony 16-35 Zeiss @16mm f/16
Can I create a starburst with my phone?
I can’t on my phone, but the technology will probably be there in the future. As of now, most phones use circular apertures that are not adjustable, which makes it impossible. I have heard of people using apps to adjust their aperture and some use the “night mode” to get the effect, but as of right now, you are better off using a DSLR with an adjustable lens.
Thanks so much for reading and feel free to comment below any questions you might have and let me know any tips you have for starburst photos!